How to Steam Clothes – A Step By Step Guide
You’ve likely heard how clothing steamers are so much faster and easier to use than an iron. If you’ve bought one, you may soon realize there is a learning curve to steaming effectively. Get it wrong and you could create more wrinkles in your clothing than you started with!
In this post, I will give you a basic guide on how to steam clothes. Follow this guide and you’ll be steaming through that laundry pile in no time! Lets get started:
Start With Easy Items
Like when my mom taught me to iron as a young girl, I started with easy items, such as pillow cases and handkerchiefs. I’d recommend taking a similar approach when learning how to steam clothes.
Don’t go starting with a business shirt that needs sleeve creases, a crisp collar and perfect buttons. You will most likely get frustrated, maybe even burn yourself and give up before you’ve got through that one item, rendering your clothes steamer useless.
Grab some lightweight semi wrinkled clothing that is receptive to steam. Some cotton blend t-shirts, chino style shorts, or a short cotton dress. I say short, as trying to steam a floor length dress isn’t a great place to start.
If you want to steam all of your pillowcases, tea towels and handkerchiefs go right ahead. Practice makes perfect.
Prepare Steamer For use
Firstly, please read the manufacturer recommendations regarding the use of your garment steamer. Ensure you are using distilled water in your clothes steamer, unless your steamer has a built-in function for de-calcifying tap water. If you are able to use tap water, use cold water only.
It is important to use distilled or demineralized water to keep your clothes steamer in the best condition internally. This helps to avoid calcium deposits which buildup in your clothes steamer, eventually causing it to clog and stop working. It can also cause spitting from your steamer and white marks on your clothing.
Fill the tank of your steamer. It is good practice to empty out the water reservoir when you are finished steaming, so consider how many garments you need to steam when filling the tank. Do not overfill the tank, this could cause leaks, damaging your device and making a mess around you.
Secure the lid of the water reservoir before plugging in and turning on your machine.
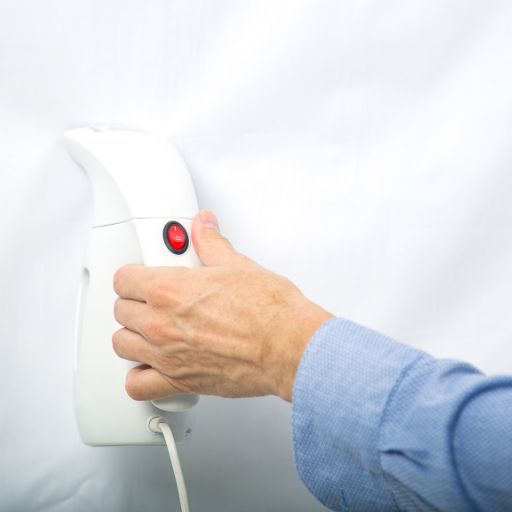
The size of your clothing steamer and the amount of water you have put into the tank will determine the time it takes to heat up to the required temperature and start to produce steam. If you have a handheld clothes steamer this should be less than a minute.
Upright clothing steamers typically take a few minutes to heat up, whilst some commercial steamers need 15 minutes to fully heat the boiler tank.
There may be a few water droplets when the machine first starts turning the water into steam. This is normal. Allow your garment steamer to heat up fully before you start steaming. Some may start emitting straight away, others you may need to press a button to make it work.
If your garment steamer has multiple steam settings, choose the most appropriate steam setting for the item of clothing. Take a look at the wash label, if it says iron on a low heat setting, then steam on lowest setting too.
Hang the Garments
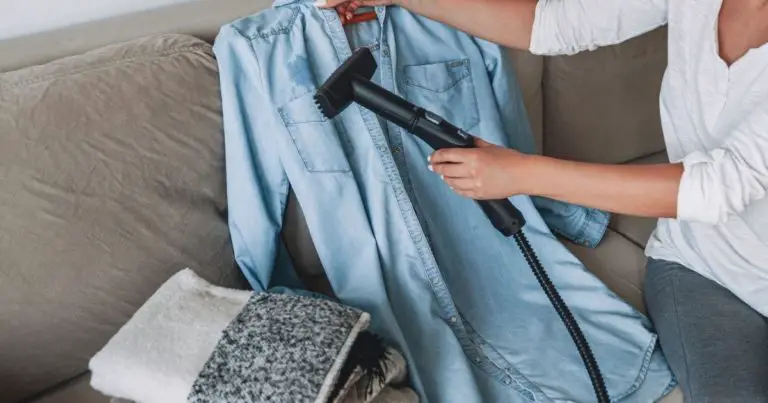
It is ideal to steam your clothing whilst it is hanging on a clothes hanger. An upright steamer typically has a hook to hang a coat hanger off. Some upright steamers also have a clothes hanger attachment including clips for pants, trousers or jeans.
If you are using handheld or portable steamer, hang your item on a clothes hanger. A velvet covered hanger helps to keep your clothing in place.
An over the door hook is useful to hang the coat hanger on, and the door itself provides a good backing for the item. Please keep in mind that steam can damage painted, stained or wood surfaces. A steaming pad is a great invention to help protect doors from steam.
You can also get a large sheet, fold it over and hang it over the door. This will act as protection between your clothing and the timber surface. Depending on the size of your item, you can also use the back of a chair, shower rod or curtain rod to hang your clothing from.
You don’t want to be reaching too high or bending too low, so choose a position that is comfortable for you.
Steaming with Downwards Stokes
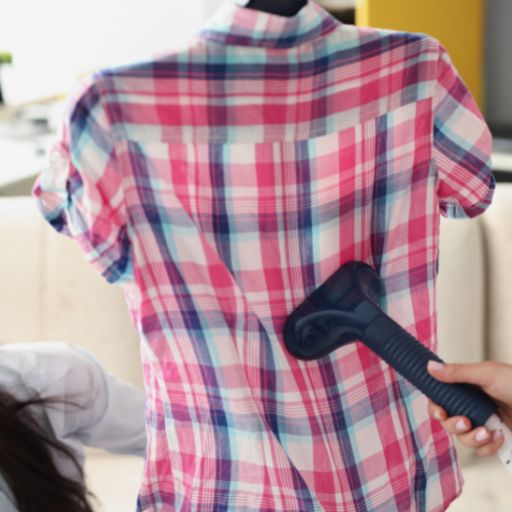
Starting from the top of the clothes, steam using continuous downward strokes. You should not need to push or press hard against the material to remove the wrinkles. Work your way from the top of the item to the bottom of your item.
Remember that steam is extremely hot. You will need to hold the clothing still with one hand and use the steamer with the other. Be very careful not to come into contact with the steam, as serious burns can occur.
Using a Handheld Pad
There is the option of using a handheld pad on the opposite hand that you are holding the steamer with. Holding this pad behind the garment as you steam will help with very wrinkled fabric.
You can also purchase a steamer board which is useful for keeping your clothing straight and secure whilst you steam the garment.
Steam from the Inside
If you are looking for extreme wrinkle removal, try steaming from the inside, or beneath the garment. This is particularly useful for skirts and heavier tops. Here the performance of your clothing steamer can be increased by the weight of material.
It is very important to protect your hands if steaming from the inside of the garment. We highly recommend the use of heatproof protective gloves for steaming if using this method.
This is a more advanced technique, typically reserved for when you have mastered how to steam clothes.
Embellishments and Pleats
If you have clothing with embellishments, use your steamer 1-2 inches away from these. For any pleating, such as a pleated skirt, or pleats in shirts, hold the fabric from the bottom edge and hold the pleat straight. Run the steamer over the pleat to keep the crease.
Check the fabric care label of your garment – if you would normally iron the pleats then it will be okay to press the sole plate of the garment steamer against the pleat. This helps form more of a crease.
Can The Steamer Head Touch Your Clothes?
It is ok for the head of your steamer to touch your clothes in most cases. The exception to this rule is with polyester, silk and leather. Typically, if you can iron the fabric, you can touch it with the steamer head too.
The closer you hold the head of the steamer to your clothing, the better result you will achieve.
Heat sensitive materials like polyester can burn and melt. As a general rule, keep the steamer head 2-4 inches away from these fabrics.
Cuffs and Collars Support
Cuffs and collars are best steamed using a steamer pad for support behind the cuff or collar. Alternatively, press the steamer head against the cuff whilst it is against a backing board, or your protected door or wall.
Some garment steamers also come with accessories to assist with steaming cuffs, collars and pockets. These handy tools make steaming even easier!
Use the Brush for Thicker garments
Another attachment most steamers come with is the fabric brush. The fabric brush is great for use on thicker items such as jackets, jumpers, coats and jeans or fabrics that are more inclined to pill.
The fabric brush helps to remove fluff and relax the fibers in your clothes. Take a look at this post where I steamed my dry clean only jacket to see just how good a fabric brush can be.
Do not use the fabric brush on delicate materials such as lace, satin, silk or chiffon which may pull.
How to Steam Delicate Fabrics and Embroidery
If your steamer has variable steam control, always use the lowest setting for delicate fabrics and embroidery. Don’t touch the sole plate of the steamer against any embellishments or the material, instead hold the steamer 2-4 inches away.
If your machine doesn’t have variable steam control, hold the steamer head further away from the material.
If wrinkles aren’t being removed effectively, test moving the steamer head closer to the garment. Do this in an inconspicuous area first (for instance inside and on a seam) before you move closer to the garment.
How to Steam a Dress Shirt
So, you’ve got through your easy clothing, pillow cases and handkerchiefs and are ready to tackle steaming a dress shirt!
Start by hanging the shirt on a secure hanger, such as a velvet hanger. This way the shirt won’t slip off.
Do up at least one of the buttons up towards the top of the shirt to keep it securely on the hanger as well.
Start by steaming the arm. Using one hand – hold the arm of the shirt out to the side and steam from the shoulder of the shirt down to the cuff. You should ideally have a steaming glove on your non dominant hand to protect it from the steam.
Repeat on the other arm of the shirt.
Steam the shoulders, under the collar and work your way down the front of the shirt, steaming in an up and down motion. Lightly hold the garment steamer over the buttons and gently steam from the top to the bottom of the shirt. You may find it helpful to hold the bottom of the shirt taught whilst you steam.
Turn the dress shirt over and check the back of the sleeves. If there are any wrinkles, you can steam these again.
Steam the back of the shirt, starting from the shoulders and working your way to the bottom. Again, use an up and down motion during the steaming process.
Are There Any Fabrics Which You Can’t Steam?
Yes! Be very careful with leather, direct heat and steam can cause damage. Suede should also be avoided and is best left to dry cleaning.
Some wedding dress fabrics should not be steamed. This guide will help you with wedding dress steaming.
Velvet can be steamed slowly and carefully, on the lowest steam setting. I have a guide to steaming jackets, which includes specific advice on leather, vinyl and velvet.
After Steaming
Wait for your steamer to cool completely before opening the water reservoir to empty any remaining water. You should NEVER open the water tank when the steamer is hot, especially if your clothing steamer has a boiler tank and heating element that heats all of the water at once.
Pressure may build up, powerful steam may shoot out of the boiler and serious injury can occur.
Some steamers come with a valve on the bottom of the reservoir to drain the water. This is an innovative idea and a much safer method of draining water from your garment steamer. Drain all the remaining water from your steamer after use and discard.
If the water canister disconnects from your steamer, leave this upside down to drain completely and dry. Water vapor that is left in the bottom of the steamer may cause mold or build up in the bottom of your steamer, causing musty odors. If this happens, see our guide to cleaning your garment steamer.
For a standing steamer, I recommend disconnecting the hose and drain any water vapor that may be caught up in the hose.
Your steamer really shouldn’t require a lot of maintenance. Using distilled or demineralized water will help to keep your steamer working effectively for years to come.
Ensure you have left your clothing to dry completely after steaming. Clothes may feel a little damp from the moisture of the steam. If this happens, hang in a well ventilated area until they are dry before storing in your wardrobe.
Storing clothes when they are damp can lead to mold and mildew problems both on your clothing and inside your cupboard.
Conclusion
Clothing steamers are easy to use once you get the hang of it. They are far more gentle on clothing than traditional ironing and make light work of getting through your pile of laundry efficiently.
Garment steamers are great for many types of clothing, including cotton, polyester, denim, nylon, microfiber, chiffon, satin and silk.
Be sure to check your fabric care labels before steaming. We highly recommend the use of a steaming glove or mitt to protect your hands, as steam will burn.
Steaming effectively takes practice, however, persist with it and you’ll be flying through your wardrobe in no time! Not to mention the other great uses for your garment steamer, such as refreshing curtains and drapes, bed linen and upholstery.
If you’re still deciding on which clothing steamer to purchase, take a look at my in depth reviews for the best products and advice.
- Can You Use a Steam Mop On Karndean Flooring? - June 19, 2024
- How To Clean Unsealed Concrete Floors - June 7, 2024
- How to Clean Stamped Concrete - June 7, 2024

